What Is Bulb Mode on Your Camera?
Bulb mode is a specialized camera setting that allows photographers to take long exposure shots beyond the typical exposure limits of the camera. This mode is essential for capturing scenes that require prolonged exposure times, such as night skies, light trails, and certain types of landscape photography. In this article, we’ll explore how to access and use bulb mode, the differences between bulb and time exposure modes, and tips for capturing sharp long exposures while managing image noise.
Accessing Bulb Mode
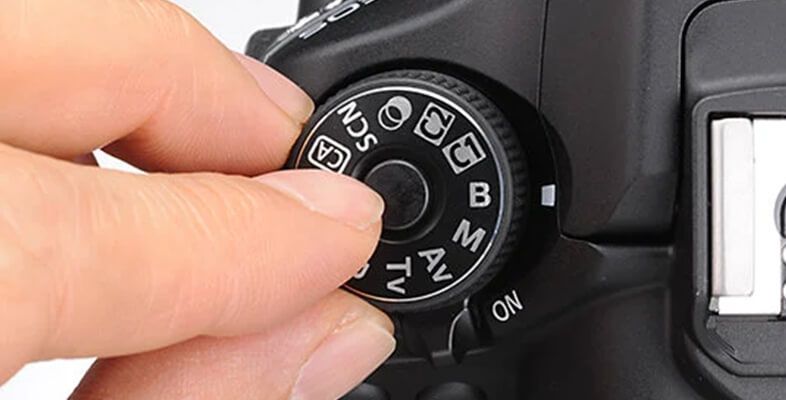
Accessing bulb mode varies depending on the camera model, but it is generally found in the manual (M) or shutter priority (Tv/S) modes. Here’s a general guide:
Switch to Manual or Shutter Priority Mode: Turn the mode dial on your camera to “M” for manual or “Tv/S” for shutter priority.
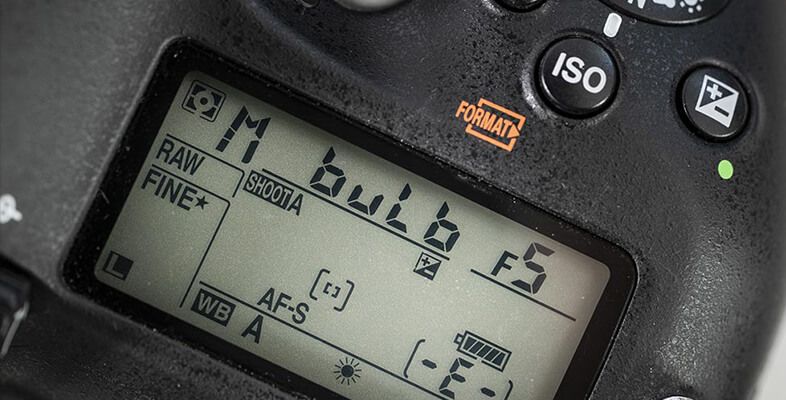
Adjust Shutter Speed: Scroll through the shutter speed settings until you pass the longest pre-set exposure time (usually 30 seconds). After this, you should see “BULB” or simply “B.”
Use a Remote Shutter Release: For the best results, connect a remote shutter release to your camera to prevent camera shake during long exposures.

How to Use Bulb Shutter Speeds
Using bulb mode effectively involves controlling the shutter manually to keep it open for as long as needed:
Start the Exposure: Press and hold the shutter button to open the shutter. With a remote shutter release, press the button to start and release it to stop the exposure.
Monitor the Time: Use a stopwatch or the timer on your remote to monitor the exposure time. Some cameras also display the elapsed time on the LCD screen.
End the Exposure: Release the shutter button to close the shutter and complete the exposure.
How to Capture Tack-Sharp Long Exposures
Long exposures can be challenging, but these tips will help you achieve sharp results:
Use a Tripod: A sturdy tripod is essential to prevent any movement during the exposure.
Remote Shutter Release: As mentioned, a remote release minimizes camera shake.
Mirror Lock-Up: If using a DSLR, enable mirror lock-up to reduce vibration from the mirror movement.
Manual Focus: Switch to manual focus and focus on your subject before starting the exposure to ensure sharpness.

Bulb vs Time Exposure Mode
Understanding the difference between bulb and time exposure modes can help you choose the best setting for your needs:
Bulb Mode: Allows you to control the exact duration of the exposure by manually pressing and holding the shutter button. It is flexible for varying exposure times.
Time Exposure Mode: Found on some cameras, this mode lets you set a specific exposure time (e.g., 2 minutes) without holding the shutter button. It is more convenient for fixed long exposures.
Image Noise with Long Exposure Photography
Long exposures can introduce image noise, but there are ways to minimize it:
Lower ISO: Use the lowest possible ISO setting to reduce noise.
Long Exposure Noise Reduction: Enable this feature in your camera settings if available. It takes a second dark frame after the exposure to subtract noise.
Post-Processing: Use noise reduction tools in post-processing software like Adobe Lightroom or Photoshop to clean up any remaining noise.
Conclusion
Bulb mode is an invaluable tool for photographers looking to capture long exposures. By understanding how to access and use bulb mode, how to achieve sharp images, and how to manage image noise, you can expand your photographic capabilities and capture stunning long exposure shots. Whether you're photographing star trails, fireworks, or nighttime cityscapes, mastering bulb mode will enable you to take your photography to the next level.

Or Get YourMoney Back
back your money in the rare case you are not satisfied with the quality of your
damage-free pictures. Only $38 for most image restorations regardless of damage

All rights reserved.