
The Brenizer Method: A Step-By-Step Guide
The Brenizer Method, named after photographer Ryan Brenizer, is a technique that creates a shallow depth of field in wide-angle photos, mimicking the look of medium format photography. This method involves stitching multiple images together to form a single, high-resolution photo with a unique depth and perspective. In this guide, we’ll explore what the Brenizer Method is, its pros and cons, and provide a step-by-step process to help you master this technique.
What is Brenizer Method?
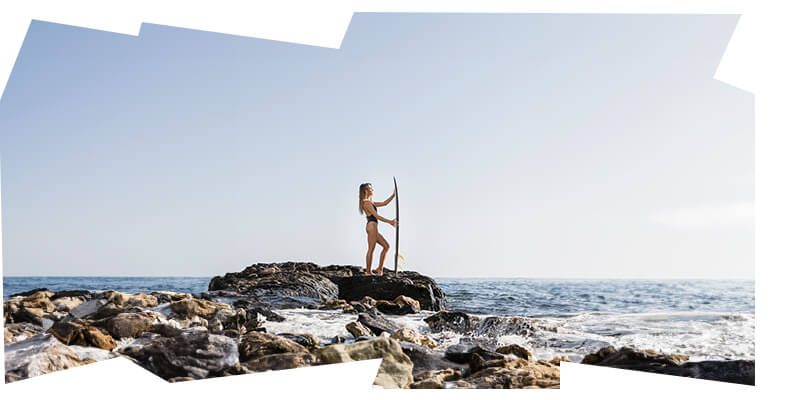
The Brenizer Method is a photographic technique that combines the depth of field of a long lens with the wide field of view of a shorter lens. By taking multiple shots with a telephoto lens and stitching them together, you can create a wide-angle image with an incredibly shallow depth of field, making the subject pop against a beautifully blurred background.
Pros And Cons Of The Brenizer Method
Pros:
Unique Look: Creates a distinctive, cinematic look with a shallow depth of field and wide perspective.
High Resolution: Produces high-resolution images due to the stitching of multiple photos.
Enhanced Background Blur: Emphasizes the subject by blurring the background more than a single wide-angle shot could.
Cons:
Complex Process: Requires more time and effort than a single shot.
Requires Post-Processing: Needs stitching software and post-processing skills.
Potential for Errors: Alignment issues or differences in exposure between shots can complicate the merging process.

How To Use The Brenizer Method: The Step-By-Step Process
Step 1: Find A Good Photo Opportunity
Subject and Background: Choose a subject that stands out and a background with interesting details that will look good blurred. Portraits in scenic locations often work well.
Lighting: Ensure consistent lighting across the scene to avoid issues during the stitching process.
Step 2: Prepare Your Settings
Lens and Aperture: Use a fast telephoto lens (e.g., 85mm f/1.4). Set a wide aperture to achieve a shallow depth of field.
Manual Mode: Switch to manual mode for consistent exposure. Lock focus and exposure settings to maintain uniformity across all shots.
Step 3: Shoot Your Images In An Organized Layout
Overlap Shots: Capture the scene in a grid pattern, ensuring about 30-50% overlap between shots. Start from the top left and move horizontally, then vertically, covering the entire area.
Consistent Settings: Keep your settings constant throughout the series to avoid variations in exposure and focus.
Step 4: Batch-Edit The Images And Export
Edit for Consistency: Import your images into editing software like Lightroom. Apply the same adjustments to all images to ensure consistency in color and exposure.
Export Images: Export the edited images in a high-resolution format suitable for stitching.
Step 5: Merge The Images
Stitching Software: Use software like Adobe Photoshop, PTGui, or Hugin to stitch the images together. Load the photos into the software and let it align and merge them into a single image.
Final Adjustments: Once stitched, make any necessary final adjustments to the merged image, such as cropping, color correction, or sharpening.

Conclusion
The Brenizer Method is a powerful technique that can elevate your photography by combining the best of both wide-angle and telephoto perspectives. While it requires more effort and post-processing, the results are often stunning and unique. By following this step-by-step guide, you can master the Brenizer Method and create breathtaking images with a distinctive look. Experiment with different subjects and settings to fully explore the creative possibilities this technique offers.


Or Get YourMoney Back
back your money in the rare case you are not satisfied with the quality of your
damage-free pictures. Only $38 for most image restorations regardless of damage


All rights reserved.

