
Food Photography - Everything You Need To Know
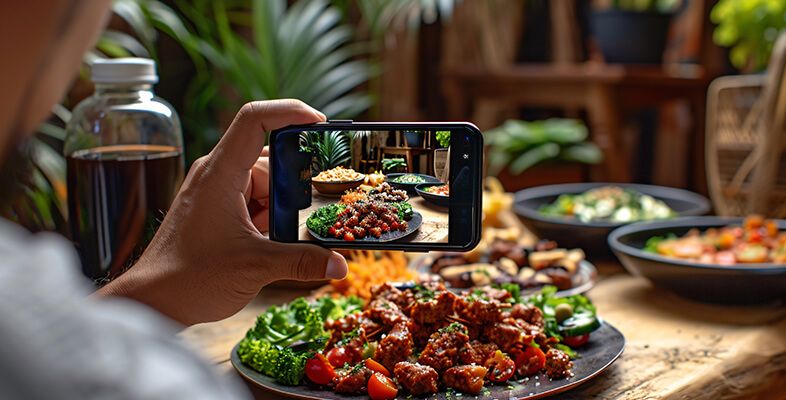
Food photography is a specialized genre that combines elements of still life photography with culinary artistry. It involves capturing visually appealing images of food to entice and engage viewers. Whether you're a professional photographer, a food blogger, or someone who loves to document their culinary creations, understanding the nuances of food photography can help you elevate your images. This comprehensive guide covers everything you need to know about food photography, from getting started to mastering advanced techniques.
What Is Food Photography?
Food photography is the art of capturing images of food in an aesthetically pleasing way. It aims to make food look as appetizing and appealing as possible, often for use in advertisements, cookbooks, menus, blogs, and social media. The goal is to evoke the senses and emotions associated with the food, making viewers want to taste and experience it.
How Do You Get Started In Food Photography?
Starting in food photography involves a combination of practice, experimentation, and learning. Here are some steps to get you started:
Study Food Photography: Begin by studying the work of professional food photographers. Analyze their compositions, lighting, styling, and angles to understand what makes their photos appealing.
Basic Equipment: You don’t need expensive equipment to start. A decent camera, a tripod, and natural light are enough for beginners. As you progress, you can invest in more specialized gear.
Practice: Practice by photographing different types of food under various lighting conditions. Experiment with angles, compositions, and settings to see what works best.
Learn Editing: Post-processing is crucial in food photography. Learn how to use photo editing software like Adobe Lightroom or Photoshop to enhance your images.
Why Is Food Photography Important?
Food photography is important for several reasons:
Marketing and Branding: High-quality food images are essential for marketing and branding. They attract customers and convey the quality and appeal of the food.
Storytelling: Food photography tells a story about the dish, the ingredients, and the experience. It connects emotionally with viewers and enhances the dining experience.
Social Media: In the age of Instagram and Pinterest, visually appealing food photos can significantly boost engagement and reach for food bloggers, restaurants, and brands.
Culinary Art: Food photography showcases the artistry and creativity of chefs and home cooks, highlighting their skills and the beauty of their creations.
Types of Food Photography
There are several types of food photography, each with its own style and purpose:
Editorial Food Photography: Used in magazines, cookbooks, and blogs, this style focuses on storytelling and often includes elements like props and backgrounds to set a scene.
Commercial Food Photography: This style is used in advertisements, packaging, and menus. It aims to present the food in the most appetizing way possible to entice customers.
Social Media Food Photography: Designed for platforms like Instagram, this style often features vibrant, eye-catching images that engage viewers quickly.
Product Food Photography: Focuses on specific food products, often used for e-commerce sites. It highlights the product’s features and packaging.
What is The Equipment Needed for Food Photography?
Having the right equipment can greatly enhance your food photography. Here’s what you need:
Camera: A DSLR or mirrorless camera with manual settings is ideal. These cameras offer better control over exposure, focus, and image quality.
Lenses: A macro lens for close-up shots, a 50mm prime lens for general use, and a 24-70mm zoom lens for versatility are great choices.
Tripod: A sturdy tripod helps stabilize your camera, especially in low light conditions or when shooting from above.
Lighting: Natural light is best, but you can use artificial lights like softboxes or LED panels if needed. Reflectors and diffusers help control the light.
Backdrop and Surfaces: Various backdrops and surfaces add texture and interest to your photos. Wood, marble, and fabric are popular choices.
Editing Software: Adobe Lightroom and Photoshop are essential for post-processing and enhancing your images.
How To Shoot Food Photography
Here are the key steps for shooting food photography:
Plan Your Shot: Think about the story you want to tell and plan your composition, lighting, and props accordingly.
Set Up Your Scene: Arrange your food and props on a clean surface. Use backgrounds and surfaces that complement the food.
Use Natural Light: Place your setup near a window with diffused light. Use reflectors to bounce light and eliminate shadows.
Adjust Your Camera Settings: Use a low ISO (100-400) to reduce noise, a narrow aperture (f/8-f/16) for a deeper depth of field, and a fast shutter speed (1/125 or faster) to avoid blur.
Experiment with Angles: Shoot from various angles – overhead, 45 degrees, and eye level – to see which perspective works best for your composition.
Focus on Details: Pay attention to small details like garnishes, textures, and colors to enhance the visual appeal.
Post-Processing: Edit your photos to adjust exposure, contrast, saturation, and sharpness. Remove any distractions or imperfections.
Food Photography Tools
In addition to basic equipment, some tools can help enhance your food photography:
Reflectors: Reflectors bounce light back onto the subject, reducing shadows and adding highlights.
Diffusers: Diffusers soften harsh light and create a more even, flattering illumination.
Backdrop Stands: Stands hold your backdrops in place and allow you to switch between different backgrounds easily.
Food Styling Tools: Brushes, tweezers, and pipettes help with precise food styling and arrangement.
Props: Plates, cutlery, napkins, and other props add context and interest to your photos.
Major DSLR Controls
Understanding your DSLR’s major controls is essential for mastering food photography:
ISO: Controls the camera’s sensitivity to light. Use a low ISO (100-400) to reduce noise and maintain image quality.
Aperture: Controls the depth of field. A narrow aperture (f/8-f/16) keeps more of the image in focus, while a wide aperture (f/2.8-f/5.6) creates a shallow depth of field for selective focus.
Shutter Speed: Controls the duration the camera’s sensor is exposed to light. Use a fast shutter speed (1/125 or faster) to prevent motion blur.
White Balance: Adjusts the color temperature to ensure accurate color reproduction. Set the white balance according to the lighting conditions.
Focus Modes: Use manual focus or single-point autofocus for precise control over what’s in focus.
Best Food Photography Props
Props play a crucial role in food photography by adding context, texture, and interest. Here are some of the best props to use:
Plates and Bowls: Choose neutral or complementary colors to avoid clashing with the food.
Cutlery: Vintage or stylish cutlery adds a touch of elegance and character to your photos.
Napkins and Fabrics: Use napkins, tablecloths, and fabric swatches to add texture and color.
Backgrounds: Wood, marble, and textured backgrounds create a professional look and enhance the overall composition.
Glassware: Glasses, jars, and bottles add depth and dimension to your photos.
Seasonal and Themed Props: Use props that align with the theme or season, such as autumn leaves, Christmas ornaments, or summer fruits.
Top Tips for Food Photography Beginners
For those new to food photography, here are some top tips to help you get started:
Start with Natural Light: Use natural light as much as possible. It’s flattering and easy to work with.
Keep It Simple: Focus on the food and avoid overcrowding your shots with too many props.
Experiment with Angles: Try different angles to find the most appealing perspective. Overhead shots are great for flat lays, while 45-degree angles work well for plated dishes.
Focus on Freshness: Use fresh ingredients and prepare the food just before shooting to ensure it looks its best.
Edit Thoughtfully: Use editing software to enhance your images, but avoid over-editing. Aim for a natural and appetizing look.
Practice Regularly: The more you practice, the better you’ll become. Experiment with different techniques and styles to develop your skills.
Conclusion
Food photography is a rewarding and creative pursuit that combines culinary art with visual storytelling. By understanding the basics, investing in the right equipment, and practicing regularly, you can create stunning images that capture the essence and beauty of food. Whether you’re shooting for a blog, social media, or professional purposes, these tips and techniques will help you elevate your food photography to the next level.


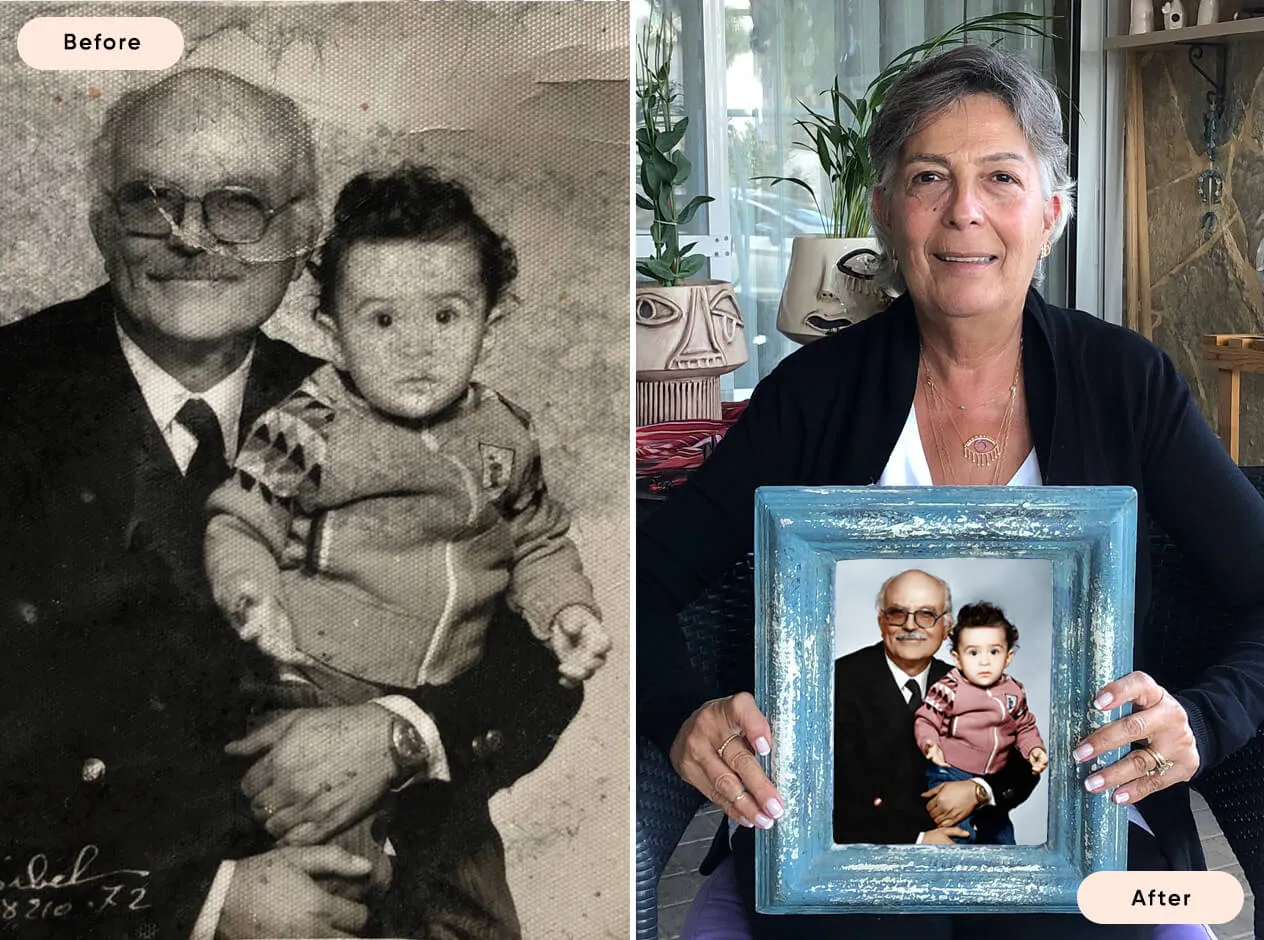
Or Get YourMoney Back
back your money in the rare case you are not satisfied with the quality of your
damage-free pictures. Only $38 for most image restorations regardless of damage


All rights reserved.

